Spring Plumbing Maintenance for Prosper Homes: Start With Outdoor Faucet Repair
Outdoor faucet repair is one of the highest-ROI spring tasks for homeowners in Prosper, TX because hose bib leaks often appear after winter freezes and temperature swings. Spring plumbing maintenance also protects sprinkler systems, prevents foundation-adjacent pooling, and reduces surprise water bills before summer irrigation season begins.
Spring plumbing maintenance in Prosper and Celina, TX usually takes 1–3 hours for a careful homeowner walkthrough. Spring plumbing maintenance supplies commonly cost $20–$100 for basics such as rubber washers, packing, PTFE tape, a hose bib vacuum breaker, and sprinkler nozzles, with costs varying by home age and fixture type. Outdoor faucet repair can stay in the $5–$30 DIY range when a washer causes a drip, but outdoor faucet repair can rise significantly when a cracked pipe sits behind brick or inside a wall.
Licensed Prosper TX plumbing professionals at Specialty Plumbing handle full-service diagnosis and repair when leaks hide behind walls, when shutoffs fail, or when corrosion turns a simple repair into a pipe replacement.
Quick Summary: Outdoor Faucet Repair + Spring Checklist
Outdoor faucet repair refers to fixing leaks, low pressure, or freeze damage at an exterior hose bib so outdoor water use stays safe and efficient. Spring plumbing maintenance is the best time to handle outdoor faucet repair in Prosper, TX because winter stress commonly damages washers, packing, stems, and even the interior supply line feeding the hose bib.
Outdoor faucet repair usually starts with a fast inspection for drips at the spout, water at the handle, leaks at the wall penetration, or low pressure. Outdoor faucet repair often involves replacing a 3/8" or 1/2" rubber washer, tightening or repacking a packing nut, or replacing a worn stem assembly. Frost-proof hose bib replacement becomes the best option when corrosion, pitting, or a cracked body appears.
Sprinkler system checks should follow outdoor faucet repair because irrigation leaks can waste hundreds to thousands of gallons before a homeowner notices. Indoor checks for under-sink leaks, toilet flapper seepage, and water heater seepage round out the checklist. Specialty Plumbing in Prosper, TX can confirm hidden leaks, replace damaged hose bibs, and correct code-related issues when DIY risk rises.
Why Spring Plumbing Maintenance Matters in Prosper and Celina, TX
Spring plumbing maintenance is a seasonal inspection and minor-repair routine that catches leaks and freeze damage before summer water use spikes. Prosper-area homes often experience quick warm-ups after cold fronts, and rapid temperature changes can stress outdoor plumbing components.
Outdoor plumbing leaks create three common North Texas problems:
- Outdoor faucet leaks can saturate soil near the slab edge, which increases the risk of movement and water intrusion.
- Hose bib drips can raise water bills because a “small drip” can run continuously for weeks.
- Sprinkler system leaks can create persistent soggy areas that attract mosquitoes and cause turf disease.
Spring plumbing maintenance also reduces emergency calls. Emergency plumbing calls often cost more because after-hours or weekend scheduling can apply, and water damage grows quickly in Texas humidity.
Homeowners who want a bigger-picture maintenance cadence can compare seasonal tasks in Year-Round Plumbing Maintenance Guide for Prosper and Celina Homeowners and deeper preventive planning in Preventive Plumbing Maintenance in Prosper & Celina, TX: The Complete Homeowner Checklist (Costs, Timing, DIY vs Pro).
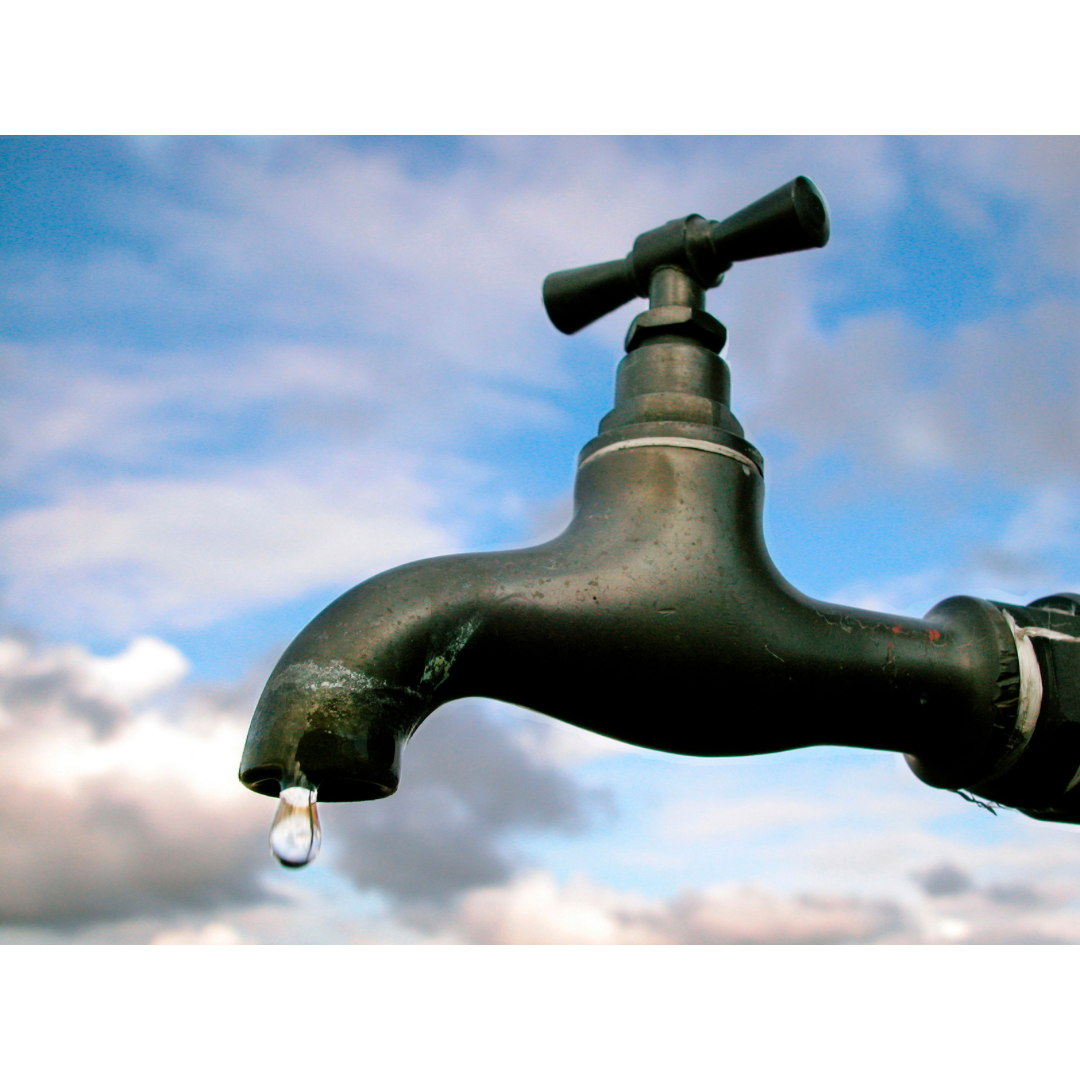
Outdoor Faucet Repair 101: Hose Bib Types, Parts, and What Fails
An outdoor faucet (hose bib) is an exterior valve that supplies water for hoses, pressure washers, and irrigation attachments. A frost-proof hose bib is a longer valve design that places the shutoff seat deeper inside the heated envelope of the home, which reduces freeze risk when installed correctly.
Outdoor faucet repair commonly involves these parts:
- Handle and screw (controls opening/closing)
- Packing nut (seals around the stem to stop handle-area leaks)
- Stem assembly (internal moving shaft)
- Rubber washer at the end of the stem (seals against the valve seat)
- Vacuum breaker/backflow preventer (prevents contaminated water from siphoning back into the home supply; many municipalities require protection on exterior outlets)
Outdoor faucet repair problems spike after winter because rubber washers harden, mineral scale accumulates, and freeze expansion can crack the valve body or the copper/PEX supply line inside the wall.
Signs Outdoor Faucet Repair Is Needed (Fast Diagnosis)
Outdoor faucet repair becomes urgent when any of the following symptoms appear during the first spring use.
Dripping at the spout (most common)
A spout drip usually indicates a worn washer, a damaged valve seat, or debris preventing full closure. A spout drip often stays DIY-friendly when the stem disassembles cleanly.
Water leaking from the handle area
A handle-area leak often points to a loose packing nut or worn packing material. A packing nut adjustment often stops the leak in minutes.
Water leaking at the wall or siding penetration
A wall-area leak often signals a cracked pipe inside the wall, a split solder joint, or a freeze-cracked frost-proof barrel. A wall-area leak can cause hidden moisture in sheathing, brick ties, or interior drywall.
Low pressure or sputtering at the hose bib
Low pressure can come from a clogged vacuum breaker, debris in the outlet, a partially closed shutoff valve, or a supply line leak bleeding pressure behind the wall. Low pressure limited to one hose bib often points to a localized restriction or damage.
Hissing sounds or meter movement with all fixtures off
A hissing sound near the wall penetration or a moving water meter can indicate a hidden leak. A hidden leak requires professional leak isolation.
Mini decision tree for homeowners
- Outdoor faucet leak at spout or handle → Washer/packing repair often works.
- Outdoor faucet leak at wall penetration or inside wall → Shut off water and schedule a plumber.
- Outdoor faucet low pressure at one location → Check vacuum breaker, hose, and shutoff valve.
- Outdoor faucet low pressure across multiple fixtures → Broader supply problem may exist.
How to Do Outdoor Faucet Repair (DIY-Friendly Steps)
Outdoor faucet repair can be safe for a homeowner when the leak stays visible and the shutoff valve works. Outdoor faucet repair should stop immediately when corrosion locks parts in place or when pipe movement occurs.
Tools and parts homeowners commonly use
Outdoor faucet repair typically needs an adjustable wrench, a flathead screwdriver, channel-lock pliers, PTFE tape, silicone plumber’s grease, and replacement washers. Outdoor faucet repair sometimes needs a stem kit, depending on the brand and age.
Locate and test the shutoff valve
A hose bib shutoff valve often sits inside the home near the exterior wall, sometimes in a garage or utility room. A working shutoff valve should fully stop flow to the hose bib when closed.
Shut off water and relieve pressure
A closed shutoff valve should be followed by opening the outdoor faucet to drain remaining water. A drained line reduces spray when the stem comes out.
Remove the handle
A handle screw usually sits at the center of the handle. A removed handle exposes the packing nut and stem.
Loosen the packing nut and remove the stem assembly
A packing nut usually loosens with an adjustable wrench. A stem assembly typically unscrews by turning counterclockwise.
Replace the rubber washer (common sizes: 3/8" or 1/2")
A stem washer typically attaches with a small screw at the end of the stem. A hardware store match using the old washer reduces guesswork.
Inspect the valve seat and internal surfaces
A valve seat with deep pitting can prevent a tight seal even with a new washer. A heavily corroded seat often justifies a full hose bib replacement.
Reassemble with proper sealing practices
PTFE tape belongs on threaded connections when manufacturer guidance allows. Silicone plumber’s grease on O-rings and packing can reduce friction and extend life.
Restore water and test under pressure
A slow open of the shutoff valve reduces water hammer. A paper towel wipe test helps confirm no seepage at the packing nut or spout.
Confirm the leak source at the stem
A stem leak usually appears behind the handle when the faucet runs or when the faucet stays pressurized.
Tighten the packing nut slightly
A packing nut often needs only a 1/8 to 1/4 turn. Over-tightening can make the handle hard to turn and can damage packing.
Re-test with faucet on and off
A successful adjustment stops seepage during operation and while closed. A persistent leak often needs new packing or a stem rebuild.
Confirm shutoff control and drain-down capability
A working interior shutoff and drain point reduces flood risk. A missing shutoff often turns replacement into a plumber job.
Measure the correct length and connection type
Frost-proof hose bib length typically ranges from 4" to 14" depending on wall thickness. Connection types can be sweat/solder, threaded, or PEX.
Remove and replace using code-appropriate methods
Soldering near combustible materials requires heat shielding and skill. PEX connections require the correct crimp or expansion tools.
Add backflow protection where required
Vacuum breakers can be integral or add-on. Local code and manufacturer requirements should guide final configuration.
A homeowner who feels uncertain during replacement should pause and call a licensed plumber. Specialty Plumbing frequently sees cracked interior pipes caused by forcing a stuck hose bib body.
Outdoor Faucet Repair Mistakes That Raise Repair Costs
Outdoor faucet repair stays affordable when parts come apart cleanly and water stays controlled. Outdoor faucet repair costs rise when avoidable mistakes occur.
Common mistakes include:
- Forcing a frozen stem and snapping the supply pipe inside the wall
- Overtightening brass fittings and cracking the valve body
- Skipping backflow protection and creating a contamination risk
- Leaving a hose attached during freezing weather, which traps water in frost-proof barrels
- Ignoring a wall-area leak that saturates framing or insulation
Homeowners who want to avoid expensive “small mistake” scenarios can review patterns in 5 Plumber Mistakes That Cost Prosper TX Homeowners Thousands (and How to Avoid Them).
Sprinkler System Spring Start-Up: Inspection and Troubleshooting
A sprinkler system is a network of valves, lateral lines, and sprinkler heads controlled by a timer to irrigate landscaping. Sprinkler system leaks often appear in spring because shallow lines and fittings experience freeze stress and soil movement.
Why sprinkler checks matter before summer watering
Sprinkler system leaks can waste large volumes because irrigation runs unattended. Prosper and Celina homeowners often discover leaks only after a high bill or a persistently wet patch.
What to inspect during the first watering cycles
A sprinkler system inspection should focus on visible symptoms:
- Soggy patches or pooling water near heads or valve boxes
- Weak spray patterns, misting, or heads that fail to pop up
- Heads that leak after the zone turns off (possible valve seepage)
- Erosion channels that send water toward the foundation
- Controller issues such as dead displays, zone failures, or inconsistent scheduling
Run one zone at a time for 2–5 minutes
A short run time reveals broken heads without overwatering. A zone-by-zone test isolates problems faster.
Walk the zone and flag issues
A flagged head list prevents repeat walking. A smartphone note with zone numbers speeds repairs.
Check valve boxes for standing water
Standing water inside a valve box can signal a leaking valve, union, or fitting. A valve leak often requires parts matching the existing brand and model.
Investigate wet spots with gentle digging
Hand trowels reduce pipe puncture risk. Sharp shovels can create new leaks.
Common sprinkler fixes homeowners can handle
Sprinkler head replacement often costs $2–$10 per head depending on style and brand. Nozzle cleaning often solves poor spray when debris clogs the orifice.
Sprinkler problems that usually need a pro
Valve manifold leaks, electrical faults, and broken underground laterals often require specialized diagnosis. Licensed plumbing and irrigation professionals can pressure-test zones and locate leaks with minimal excavation.
A real-world local pattern involves “extra green” patches near driveways or sidewalks. A hidden lateral leak can undermine soil and contribute to concrete movement if ignored.
Indoor Spring Plumbing Checks That Prevent Surprise Leaks
Indoor spring plumbing checks catch slow leaks that winter stress can worsen. Indoor spring plumbing checks also reduce mold risk in cabinets and behind appliances.
Under-sink and vanity inspection
A cabinet inspection should look for water staining, warped wood, corrosion on angle stops, and musty odors. A musty odor often indicates a slow leak that evaporates before pooling.
Toilet leak test (2-minute method)
A toilet dye test uses food coloring in the tank. A color change in the bowl without flushing usually indicates a flapper leak that wastes water continuously.
Water heater visual check
A water heater check should look for rust streaks, moisture at the temperature and pressure relief (TPR) valve discharge, and puddling at the base. A typical tank water heater lifespan often lands around 8–12 years, with local water chemistry and maintenance affecting longevity.
Laundry and appliance supply hoses
A laundry inspection should check for bulges, cracking, and corrosion at hose ends. Many professionals recommend replacing rubber hoses with braided stainless hoses for improved burst resistance.
Cost Factors and Time Expectations (DIY vs Pro Reality)
Outdoor faucet repair costs vary based on access, corrosion, and whether the leak sits inside the wall. Sprinkler system repair costs vary based on zone complexity and leak location depth.
Typical time expectations by task
- Outdoor faucet inspection per faucet: 5–10 minutes
- Outdoor faucet washer/packing repair: 15–45 minutes when parts cooperate
- Outdoor faucet replacement: 60–120 minutes depending on wall access and connection type
- Sprinkler zone test: 20–45 minutes for an average yard
- Sprinkler head replacement: 10–20 minutes per head
- Indoor leak walk-through: 20–40 minutes
Typical cost ranges homeowners commonly report (non-binding)
- Outdoor faucet repair (washer/packing DIY): $5–$30 in parts
- Outdoor faucet replacement parts (hose bib): $15–$75+ for many common models
- Sprinkler head/nozzle replacement: $2–$10 per head/nozzle
- Professional repair for hidden leaks or pipe replacement: $150–$500+ in many scenarios, with access and damage driving variation
What drives pricing up
- Brick or stone exterior access limitations
- Corroded galvanized lines or mixed-material transitions
- Missing or non-working shutoff valves
- Prior DIY repairs that used mismatched fittings or sealants
- Water damage remediation needs after prolonged leakage
Specialty Plumbing provides diagnosis and repair by licensed Prosper TX plumbing professionals, and a local full-service provider can coordinate repairs that cross indoor/outdoor boundaries.
When Outdoor Faucet Repair Should Shift to a Licensed Professional
Professional plumbing help becomes the safest option when outdoor faucet repair moves beyond a visible, controlled leak. Licensed plumbing service also protects code compliance and reduces the risk of hidden water damage.
Call a licensed plumber when any of the following conditions appear:
- Water leaks from behind the wall, brick, or siding penetration
- A shutoff valve fails to fully stop water to the hose bib
- A stem assembly refuses to loosen without significant force
- Outdoor faucet replacement requires soldering, wall opening, or pipe modification
- Water pressure stays low across multiple fixtures after basic checks
- Water meter movement continues with all fixtures off (possible hidden leak)
- Mold odors, drywall staining, or bubbling paint appears near exterior walls
Specialty Plumbing serves Prosper and Celina, TX with full-service troubleshooting, including outdoor faucet replacement, freeze-damage repair, and leak isolation when symptoms point to behind-the-wall failures.
Leak Damage-Control Timeline (What to Do Immediately)
A plumbing leak response plan reduces water damage and repair scope. A structured response also helps a plumber diagnose faster.
- First 10 minutes: A homeowner should shut off the nearest supply valve and place towels or a bucket to control water.
- 10–30 minutes: A homeowner should open nearby faucets to relieve pressure and move stored items away from wet areas.
- First hour: A homeowner should assess whether a washer/packing fix applies and call a licensed plumber if water appears inside walls or ceilings.
Texas humidity accelerates material swelling and mold growth, so quick action matters.
Pro Tips From the Field (Practical, Low-Cost Wins)
- PTFE tape on threaded outdoor connections can reduce minor weeping when threads seal correctly.
- Basin wrenches and compact adjustable wrenches help in tight hose bib locations near brick returns.
- Paper towel testing after drying fittings reveals fresh seepage better than visual checks alone.
- Spare sprinkler nozzles and a head puller tool reduce mid-season downtime.
- White mineral deposits around valves and fittings often indicate a slow leak that deserves attention.
Common Questions About Outdoor Faucet Repair and Spring Plumbing Maintenance
Is outdoor faucet repair safe as a DIY project?
Outdoor faucet repair is usually safe for spout drips or handle leaks when a working shutoff valve controls the line. Outdoor faucet repair should stop immediately when corrosion, stuck stems, or wall-area leaks appear because hidden pipe damage can escalate quickly.
What causes a hose bib to leak after winter in Prosper, TX?
Hose bib leaks after winter often come from hardened rubber washers, loose packing nuts, or freeze expansion cracking internal parts. Prosper-area temperature swings can also stress solder joints or PEX fittings inside exterior walls.
How often should a sprinkler system check happen?
Sprinkler system checks should happen at least twice per year, with an early spring start-up and a mid-summer performance review. Sprinkler system checks after a hard freeze can catch cracked fittings before major water loss occurs.
What does low pressure at one outdoor faucet usually mean?
Low pressure at one hose bib often points to a clogged vacuum breaker, debris in the outlet, a kinked hose, or a partially closed shutoff valve. Low pressure paired with wall moisture can indicate a supply line leak behind the wall.
When does outdoor faucet replacement make more sense than outdoor faucet repair?
Outdoor faucet replacement often makes more sense when the valve body shows pitting, cracking, or chronic leaking after washer replacement. Frost-proof hose bib installation can also reduce future freeze risk when the existing faucet design lacks freeze protection.
Spring Checklist Recap: A Simple Order of Operations
A spring plumbing maintenance checklist works best when tasks follow a logical sequence:
- Outdoor faucet inspection and outdoor faucet repair (highest leak risk after winter)
- Sprinkler system zone test and head/nozzle corrections
- Indoor leak scan under sinks, around toilets, and at the water heater
- Follow-up monitoring for 7 days, including watching for soggy patches and checking the water meter
A consistent checklist reduces emergency calls and protects the home envelope.
Local Help for Outdoor Faucet Repair in Prosper and Celina, TX
Outdoor faucet repair in Prosper and Celina, TX benefits from a local plumber who understands North Texas freeze patterns, soil movement, and common exterior wall construction. Specialty Plumbing is a locally owned, full-service provider staffed by licensed Prosper TX plumbing professionals who can diagnose hose bib leaks, replace frost-proof faucets, and resolve behind-the-wall supply line damage.
Homeowners who want professional guidance beyond outdoor faucets can explore broader maintenance planning in Preventive Plumbing Maintenance in Prosper & Celina, TX: The Complete Homeowner Checklist (Costs, Timing, DIY vs Pro) and avoid common cost amplifiers in 5 Plumber Mistakes That Cost Prosper TX Homeowners Thousands (and How to Avoid Them).
A spring inspection now often prevents a summer emergency later, especially when outdoor faucet repair symptoms point to hidden freeze damage.