Outdoor faucet repair: the homeowner quick summary
Outdoor faucet repair restores a hose bibb (spigot) that drips, leaks at the handle, won’t shut off, or leaks inside the wall, and outdoor faucet repair prevents wasted water and moisture damage around siding, brick, and foundations. Outdoor faucets fail from worn rubber washers, damaged O-rings, corroded valve seats, stripped threads, mineral scale, and freeze expansion in the supply tube. A basic repair often involves shutting off the water, disassembling the stem, replacing a washer or packing, cleaning the valve seat, and reassembling with correct sealing practices. A more complex repair involves replacing a frost-free sillcock, repairing a split pipe in the wall, or correcting a failed anti-siphon vacuum breaker.
Outdoor faucet problems in Prosper TX commonly show up after seasonal temperature swings, heavy irrigation use, or long periods of inactivity. Specialty Plumbing, a locally owned full-service provider with licensed Prosper TX plumbing professionals, often finds that “small” outdoor leaks trace back to hidden cracks or loose connections behind the exterior wall. Pricing varies by project scope, materials, and access conditions, and repair timelines vary by diagnosis complexity and drying or restoration needs.
Outdoor faucets: what the fixture is and why failures matter
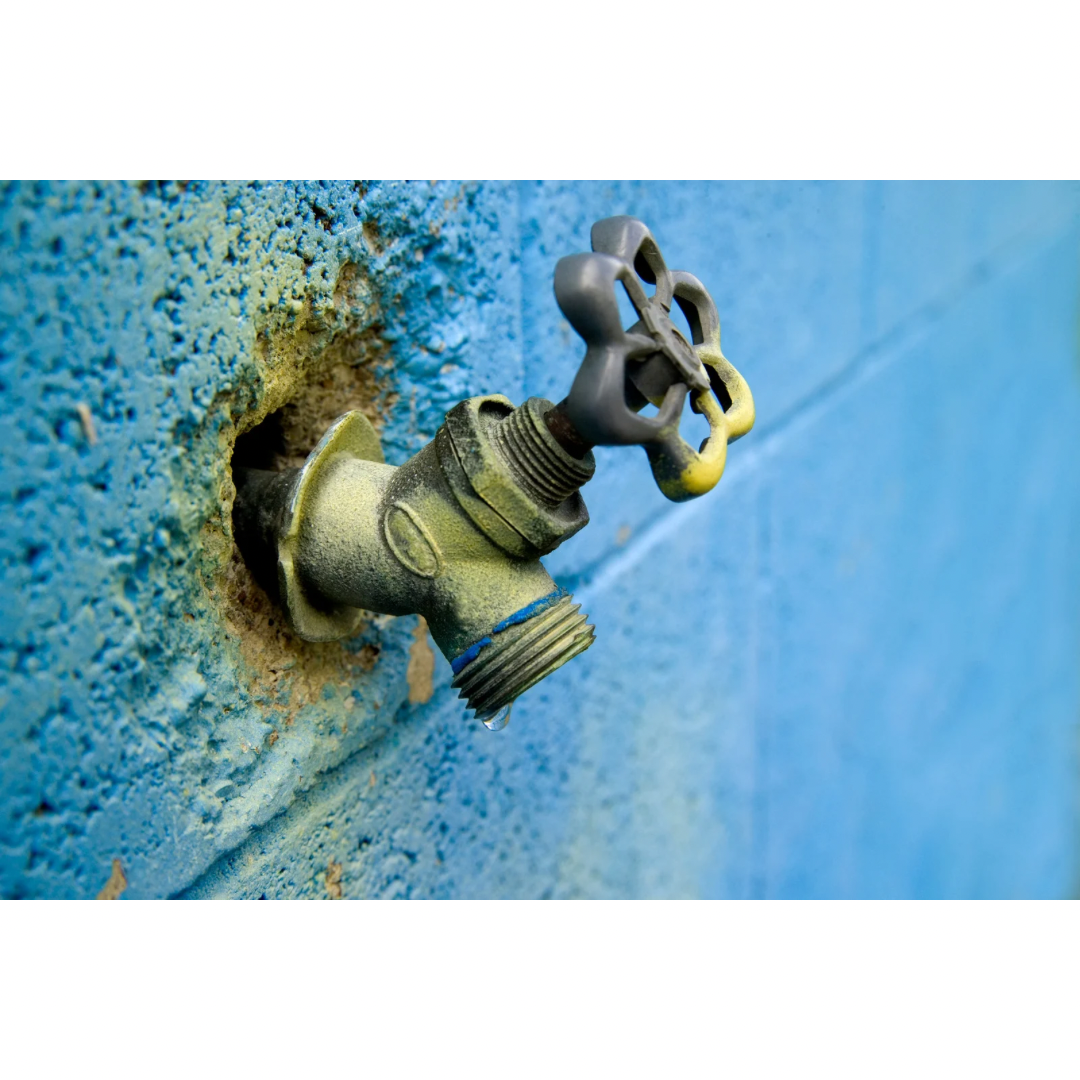
Outdoor faucets are exterior shutoff valves that connect a home’s pressurized water supply to a garden hose, and outdoor faucets include standard hose bibbs, anti-siphon hose bibbs, and frost-free sillcocks. Outdoor faucet failures matter because a slow drip can waste water over time and because a concealed leak can wet framing, sheathing, insulation, and masonry interfaces.
Outdoor faucet assemblies usually include a handle, packing nut, stem, rubber washer or cartridge seal, and a threaded outlet sized for standard garden hoses. Outdoor faucet threads typically use 3/4-inch GHT (garden hose thread), and many replacement vacuum breakers and caps are sized to match 3/4-inch hose outlets. Outdoor faucet bodies are commonly brass or galvanized components, and outdoor faucet corrosion accelerates when dissimilar metals meet at a threaded joint.
Outdoor faucet damage often starts small and becomes expensive when moisture migrates into wall cavities. Outdoor faucet leaks near a foundation edge can also mimic drainage issues, so a focused plumbing diagnosis prevents misdirected repairs. Homeowners who also notice pressure changes indoors can cross-check symptoms with The Ultimate Guide to Fixing Low Water Pressure in Homes.
Common outdoor faucet problems and the most likely causes
Outdoor faucet repair starts with symptom-to-cause matching, and outdoor faucet symptoms usually point to a small set of internal parts: washers, O-rings, packing, valve seats, stems, and vacuum breakers. Outdoor faucet troubleshooting becomes urgent when water appears behind siding, under brick weep paths, or inside a wall.
Dripping from the spout after shutoff
A dripping spout usually indicates a worn rubber washer, a scratched valve seat, debris trapped at the sealing surface, or a stem that cannot fully seat. A worn washer can deform into a cone shape, and a damaged seat can cut a new washer quickly.
Water leaking around the handle
A leaking handle usually indicates a loose packing nut, dried packing material, or a worn stem O-ring. A packing adjustment can sometimes stop seepage, and over-tightening can make the handle hard to turn.
Faucet will not shut off completely
A faucet that will not shut off usually indicates a damaged washer, a pitted seat, a bent stem, or mineral scale preventing full closure. Mineral deposits can build up over months or years, especially in hard-water conditions.
Handle is hard to turn or stuck
A hard-to-turn handle usually indicates corrosion on the stem threads, mineral scale in the bonnet area, or a cracked handle hub. Penetrating oil can help loosen external fasteners, and excessive force can snap a stem or twist a copper stub-out.
Water appears inside the wall or behind siding while running water
Water inside the wall usually indicates a split frost-free sillcock tube, a loose soldered or threaded connection, or a cracked pipe caused by freeze expansion or impact. A hidden wall leak can create staining, swelling trim, damp insulation, and mold risk, so a shutoff and inspection becomes the safest next step.
Outdoor faucet types: standard vs frost-free vs anti-siphon (comparison table)
Outdoor faucet repair steps vary by faucet design, and outdoor faucet design determines where the water actually shuts off. Outdoor faucet identification prevents wrong parts ordering and prevents reassembly problems.
| Outdoor faucet type | How the shutoff works | Common failure points | What the symptom often looks like | Typical repair approach |
|---|---|---|---|---|
| Standard hose bibb | Shutoff occurs near the exterior valve seat | Washer, packing, valve seat | Drip at spout, seepage at handle | Replace washer/packing; clean or service seat |
| Frost-free sillcock (frost-proof) | Shutoff occurs deeper inside the wall at the end of a long stem | Split tube, worn stem washer, loose wall connection | Leak behind wall when running water | Replace stem parts or replace sillcock if tube is split |
| Anti-siphon hose bibb | Includes a vacuum breaker to prevent backflow | Vacuum breaker cap, internal check, debris | Spray or leak near top of outlet | Clean or replace vacuum breaker components where serviceable |
Outdoor faucet backflow protection matters because a submerged hose end can siphon contaminants into potable water during pressure changes. Outdoor faucet anti-siphon components must remain intact and correctly assembled to function as designed.
Outdoor faucet repair diagnosis: quick checks before disassembly
Outdoor faucet repair diagnosis often starts with a short checklist, and outdoor faucet diagnosis prevents unnecessary part replacement and prevents overtightening damage. Outdoor faucet diagnosis should always include a shutoff test and a connection inspection.
- Outdoor faucet diagnosis should confirm the leak location at the spout, the handle, the hose connection, or the wall penetration.
- Outdoor faucet diagnosis should check the garden hose washer because a missing or flattened hose gasket can mimic a faucet leak at the threads.
- Outdoor faucet diagnosis should confirm the presence of a local shutoff valve inside the home because a dedicated shutoff simplifies safe repairs.
- Outdoor faucet diagnosis should check for a vacuum breaker because an anti-siphon cap can leak when cracked or cross-threaded.
- Outdoor faucet diagnosis should look for a split hose because a pinhole in a hose can spray water back onto siding and resemble a wall leak.
Outdoor faucet diagnosis should stop immediately when water appears inside the wall cavity or when a pipe joint moves under light hand pressure. Outdoor faucet movement at the stub-out can indicate a loose anchor or a stressed connection.
How to fix a leaking outdoor faucet (DIY steps for common leaks)
Outdoor faucet repair for a drip at the spout or seepage at the handle often involves washer, O-ring, or packing replacement, and outdoor faucet repair requires correct shutoff and careful reassembly. Outdoor faucet disassembly should proceed slowly because older fittings can seize and because galvanized connections can bind.
Shut off the water supply to the outdoor faucet
Outdoor faucet repair should start at the closest shutoff valve feeding the hose bibb, and a whole-home main shutoff can serve as a backup. Outdoor faucet shutoff verification should include opening the outdoor faucet to confirm flow stops and pressure bleeds down.
Drain pressure and protect the work area
Outdoor faucet repair should include opening the faucet fully to drain residual water, and a bucket and towels should catch drips. Outdoor faucet work areas near electrical outlets should stay dry to reduce shock risk.
Remove the handle and packing nut (bonnet)
Outdoor faucet handle screws often use a Phillips or flathead driver, and the packing nut usually loosens with an adjustable wrench. Outdoor faucet packing nut removal should avoid rounding corners, so a correctly sized wrench matters.
Pull the stem assembly and inspect sealing parts
Outdoor faucet stem assemblies usually slide out after bonnet removal, and the stem tip often holds a flat rubber washer secured by a screw. Outdoor faucet inspection should look for cracked rubber, missing washers, and worn O-rings.
Replace the washer, O-ring, or packing with a matching part
Outdoor faucet replacement parts must match diameter and thickness, and an unmatched washer can prevent full shutoff. Outdoor faucet lubrication with plumber’s grease can reduce stem friction and reduce O-ring tearing during reassembly.
Inspect and clean the valve seat and threads
Outdoor faucet valve seats can develop pits or mineral scale, and gentle cleaning with a nylon brush can remove debris. Outdoor faucet seat resurfacing tools exist, and aggressive grinding can worsen sealing surfaces on softer metals.
Reassemble and seal threaded connections appropriately
Outdoor faucet threaded joints often benefit from PTFE tape applied in the tightening direction, and compression-style seals should remain tape-free unless manufacturer instructions allow tape. Outdoor faucet packing nuts should tighten only enough to stop seepage while allowing smooth handle movement.
Restore water flow and perform a two-stage leak check
Outdoor faucet testing should include a closed-valve check for drips and an open-valve check under flow. Outdoor faucet testing should also include a hose connection test because pressurized flow can reveal leaks that a static test misses.
Outdoor faucet repair attempts should stop when a corroded nut begins to deform or when a copper stub-out twists, because pipe movement can crack solder joints behind the wall.
Tools and materials for outdoor faucet repair (with practical purpose)
Outdoor faucet repair requires a small set of basic tools, and outdoor faucet tool selection reduces the risk of stripped fasteners and cracked fittings. Outdoor faucet repairs often go smoother when replacement parts are staged before disassembly.
- Adjustable wrench or appropriately sized open-end wrench for packing nuts and hex flats
- Screwdrivers (flathead and Phillips) for handle screws and caps
- PTFE tape for threaded joints where appropriate
- Plumber’s grease for O-rings and stem lubrication
- Replacement washers, O-rings, or packing matched to the faucet model
- Nylon brush or old toothbrush for mineral scale removal
- Penetrating oil for seized external fasteners
- Bucket and towels for controlled drainage and cleanup
- Flashlight for inspecting the wall penetration and underside of the faucet body
Outdoor faucet part matching often works best when the old washer or O-ring is brought to a hardware store for size comparison. Outdoor faucet brands and models vary, so a visual match prevents repeat disassembly.
Frost-free outdoor faucet repair: what changes and why leaks hide
Outdoor faucet repair for frost-free sillcocks differs because the shutoff point sits inside the wall, and outdoor faucet leaks can travel along the tube and exit at the siding. Outdoor faucet freeze failures often occur when a hose remains attached and traps water in the barrel.
Outdoor faucet winterization for frost-free models includes disconnecting hoses, draining attachments, and confirming the faucet barrel slopes slightly downward away from the house. Outdoor faucet slope allows drainage after shutoff, and trapped water can expand during a hard freeze and split the tube. Outdoor faucet split-tube symptoms often include water running behind siding only when the faucet is turned on.
Outdoor faucet replacement becomes more likely when a frost-free tube is cracked because internal splits often cannot be sealed reliably. Outdoor faucet replacement also becomes more likely when the wall penetration lacks a stable mounting block and movement stresses the connection.
Outdoor faucet repair timeframes: what “quick” vs “complex” usually means
Outdoor faucet repair timelines depend on diagnosis and access, and outdoor faucet repair timelines range from short, single-session tasks to multi-step projects that include drying and restoration. Outdoor faucet leak severity determines whether monitoring over days becomes necessary.
- Outdoor faucet washer or packing replacement often fits into a short maintenance window because disassembly and reassembly are limited to the valve body.
- Outdoor faucet seat cleaning and repeat testing can extend the work because sealing surfaces sometimes need multiple inspection passes.
- Outdoor faucet frost-free replacement can take longer because the supply connection may sit behind an access panel or require careful pipe work.
- Outdoor faucet hidden leak mitigation can span days because wet materials may need time to dry and because moisture checks can require repeated observation.
Outdoor faucet post-repair monitoring should include a drip check after several on/off cycles and a follow-up visual check of the wall area for dampness. Outdoor faucet leaks that return after a “successful” repair often indicate a damaged seat or a hairline crack.
What influences outdoor faucet repair complexity (and why pricing varies)
Outdoor faucet repair cost drivers include access, corrosion, faucet type, and hidden damage, and outdoor faucet repair pricing varies by project scope, materials, and local conditions. Outdoor faucet repair planning improves when homeowners understand what creates labor and parts variability.
- Outdoor faucet accessibility affects labor because tight mounting locations can require specialty wrenches and longer disassembly time.
- Outdoor faucet age and corrosion affect removability because seized threads can require careful extraction techniques to avoid pipe damage.
- Outdoor faucet type affects parts and labor because frost-free and anti-siphon models include additional components.
- Outdoor faucet damage extent affects scope because a split pipe or wet wall materials add steps beyond valve repair.
- Outdoor faucet code compliance can affect fixture selection because some installations require anti-siphon protection or specific mounting practices.
Outdoor faucet repair decisions should consider long-term reliability, because repeated washer swaps on a deeply pitted seat can become a cycle. Outdoor faucet replacement can become the more durable path when multiple internal surfaces are worn.
Damage-control checklist for a bad outdoor faucet leak
Outdoor faucet repair triage starts with stopping water and limiting spread, and outdoor faucet triage reduces the chance of mold and material swelling. Outdoor faucet leak control should prioritize shutoff and documentation.
First 10 minutes
Outdoor faucet leak control should shut off the nearest supply valve or the main shutoff, and towels or a bucket should catch active dripping. Outdoor faucet leak control should move extension cords and plugged-in devices away from wet areas.
Next 10-30 minutes
Outdoor faucet leak control should open an indoor faucet to relieve line pressure, and a quick visual check should look for water in a garage, crawlspace, or interior wall surface near the hose bibb. Outdoor faucet leak control photos can help track changes and support insurance documentation when applicable.
First hour
Outdoor faucet leak control should avoid forcing seized parts, and a wall leak should trigger a professional evaluation because hidden pipe damage can worsen quickly. Outdoor faucet leak control should keep the area ventilated when safe to reduce moisture accumulation.
Mini decision tree: DIY outdoor faucet repair vs professional help
Outdoor faucet repair can be a DIY task for minor sealing parts, and outdoor faucet repair should shift to professional work when pipe integrity or wall leakage becomes uncertain. Outdoor faucet decision-making improves when symptoms are treated as diagnostic signals.
- Outdoor faucet dripping only at the spout often supports a DIY washer or seat-cleaning attempt.
- Outdoor faucet leaking at the handle often supports a packing adjustment or packing replacement.
- Outdoor faucet leaking behind siding or inside a wall supports immediate shutoff and professional diagnosis.
- Outdoor faucet corrosion that prevents disassembly supports professional tools and techniques to avoid broken pipes.
- Outdoor faucet uncertainty about shutoff valves or water isolation supports professional help to prevent flooding.
When professional outdoor faucet repair is the safer choice
Outdoor faucet repair requires a licensed plumbing professional when water appears inside the wall, when a frost-free sillcock is suspected to be split, or when pipe connections move under light force. Outdoor faucet professional service also becomes important when repairs must meet local plumbing code or when backflow prevention components require correct configuration.
Specialty Plumbing work in Prosper TX frequently involves outdoor faucet leaks that started as “just a drip” and turned into moisture behind siding. Specialty Plumbing, a locally owned full-service provider with licensed Prosper TX plumbing professionals, can diagnose whether the leak originates at the faucet body, the connection inside the wall, or a cracked supply line. Outdoor faucet repair becomes especially technical when soldered copper, PEX transitions, or galvanized connections require careful handling to prevent collateral damage.
Homeowners who suspect a broader plumbing issue beyond the hose bibb can compare symptoms with Pipe Repair: A Homeowner’s Guide to Leaks, Burst Pipes, and Smart Fix Options and can review selection criteria in Plumbing Near Me in Prosper TX: How to Choose the Right Local Plumber, Diagnose Problems, and Avoid Costly Damage.
Field example: when a drip signaled a hidden frost-free failure
Outdoor faucet repair sometimes reveals hidden damage, and outdoor faucet puddles near a spigot can originate behind the wall rather than at the hose threads. Outdoor faucet failures after a late-season freeze can split a frost-proof stem or tube inside the wall cavity.
A Prosper homeowner noticed a recurring puddle under an outdoor spigot after watering and attempted common fixes such as tightening the hose connection, swapping a hose gasket, and replacing a washer. Specialty Plumbing inspection found water tracking behind siding, and the root cause was a split frost-free faucet component inside the wall consistent with freeze expansion. Outdoor faucet repair in that scenario required addressing the concealed leak source rather than repeating external washer replacements.
Outdoor faucet maintenance and prevention (seasonal checklist)
Outdoor faucet repair becomes less frequent when seasonal maintenance reduces freeze and corrosion stress, and outdoor faucet maintenance improves reliability during high-use months. Outdoor faucet prevention focuses on drainage, connection care, and early leak detection.
- Outdoor faucet winter prep should remove hoses and splitters to allow drainage and prevent trapped water.
- Outdoor faucet thread care should avoid cross-threading 3/4-inch GHT connections and should replace hose washers when flattened.
- Outdoor faucet operation checks should cycle the handle a few times per season to prevent stems from seizing.
- Outdoor faucet leak checks should include a visual inspection of the wall penetration for staining or soft trim.
- Outdoor faucet vacuum breaker checks should confirm the anti-siphon cap is intact and seated correctly.
Outdoor faucet irrigation add-ons such as timers and Y-splitters add weight and leverage, so a supported mounting block or stable attachment reduces stress on the stub-out connection.
Common Questions About Outdoor Faucet Repair
Why does an outdoor faucet keep dripping after a washer replacement?
An outdoor faucet can keep dripping when a valve seat is pitted or scratched and a new washer cannot seal against the damaged surface. An outdoor faucet can also drip when debris is trapped at the seat or when the stem cannot fully close due to scale.
Can a frost-free outdoor faucet be repaired the same way as a standard hose bibb?
A frost-free outdoor faucet uses a long stem that shuts off water deeper inside the wall, so frost-free outdoor faucet repair often involves different parts and different failure modes. A frost-free outdoor faucet that leaks behind siding often indicates a split tube that may require replacement rather than a simple washer swap.
What signs indicate a hidden leak behind an outdoor faucet?
A hidden leak behind an outdoor faucet often shows up as damp drywall, staining, soft trim, or moisture behind siding near the hose bibb penetration. A hidden leak behind an outdoor faucet can also show up as unexpected water use patterns or the sound of water movement when no fixtures are running.
What causes water to leak from the outdoor faucet handle?
Water leaking from an outdoor faucet handle usually indicates a loose packing nut or worn packing material around the stem. Water leaking from an outdoor faucet handle can often be reduced with a careful packing adjustment, but damaged packing typically needs replacement.
What should a homeowner do first during a major outdoor faucet leak?
A homeowner should first shut off the water supply feeding the outdoor faucet or shut off the main water valve if a local shutoff is not available. A homeowner should then contain water with towels or a bucket and avoid forcing stuck parts when water appears inside the wall.
Local context: outdoor faucet repair in North Texas communities
Outdoor faucet repair in Prosper TX often intersects with seasonal weather swings, irrigation demand, and exterior material transitions around brick and siding. Outdoor faucet repair support from Specialty Plumbing is available for homeowners in Prosper, Celina, Frisco, McKinney, Allen, Plano, Aubrey, Oak Point, and Gunter, and scheduling and coverage vary by demand and location confirmation.
Outdoor faucet repair questions often overlap with other home plumbing concerns, so a whole-system view can prevent repeat issues. Outdoor faucet repair planning can include checking indoor shutoff valves, verifying stable water pressure, and addressing related drainage concerns when exterior moisture appears near foundations.