Outdoor faucet repairs: quick summary for homeowners
Outdoor faucet repairs usually fix a leaking outdoor faucet caused by worn washers, damaged O-rings, loose packing nuts, or a failing vacuum breaker. Outdoor faucet replacement becomes the better option when corrosion, cracked housings, stripped threads, or in-wall leaks appear. Water damage risk rises when water reaches siding, sheathing, insulation, or interior drywall.
Outdoor faucets (hose bibs or sillcocks) face sun, rain, temperature swings, and hose strain, so seals wear faster than many indoor fixtures. A drip that looks minor can waste significant water over time and can contribute to rot, mold, or freeze damage during cold snaps. A safe first response involves shutting off the dedicated interior shutoff valve (or the main shutoff if needed), drying the area, and confirming whether moisture is limited to the spout/handle or extends into the wall.
Specialty Plumbing is a locally owned, full-service provider with licensed Prosper TX plumbing professionals who troubleshoot outdoor faucet leaks, faucet swaps, and pipe repairs for homeowners in Prosper, Celina, Frisco, McKinney, Allen, Plano, Aubrey, Oak Point, and Gunter. Availability varies; contact Specialty Plumbing to confirm coverage and scheduling.
Outdoor faucet repairs: what a “hose bib leak” means and why the leak matters
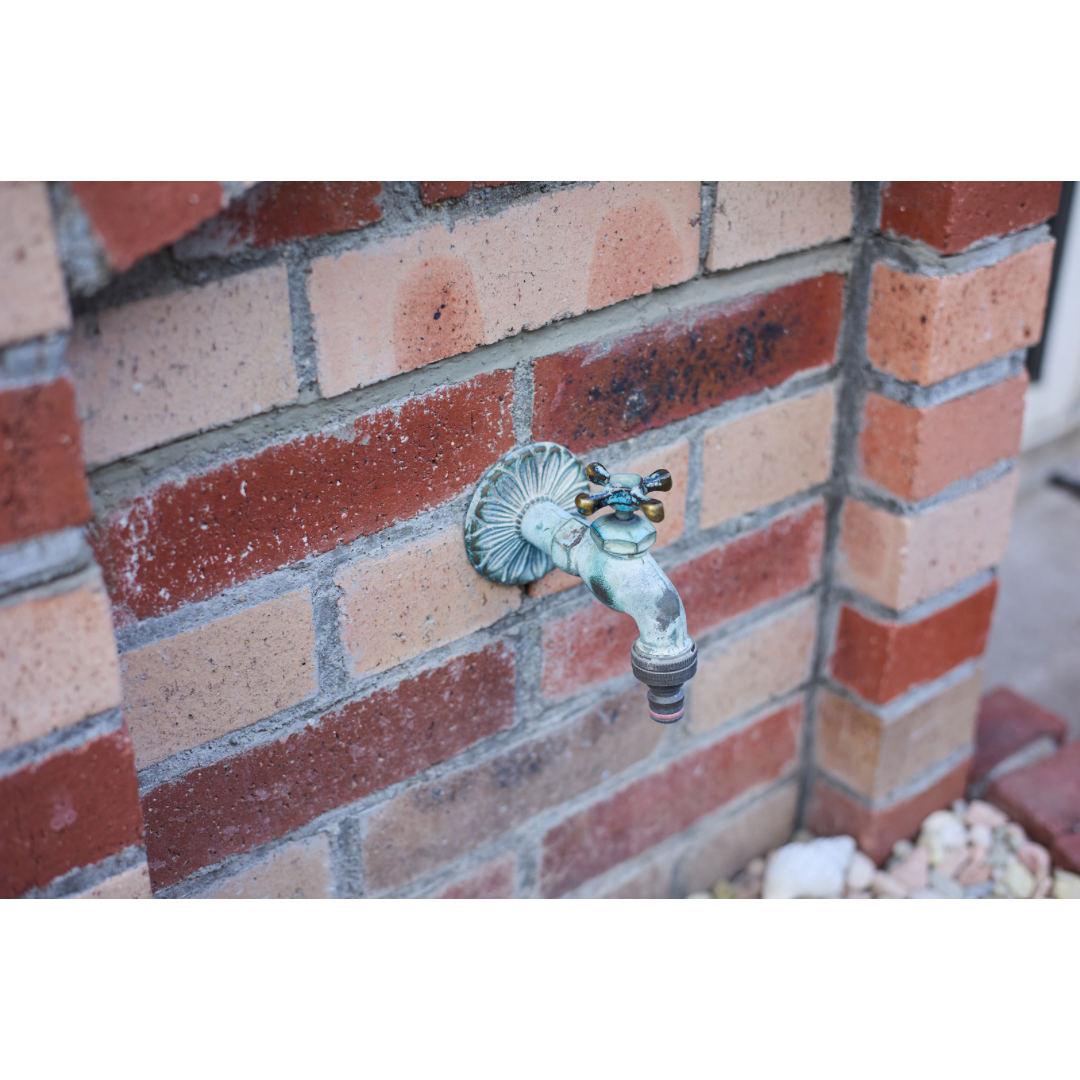
Outdoor faucet repairs refer to diagnosing and correcting water leakage at an exterior hose bibb, sillcock, or outdoor spigot by restoring a watertight seal at the valve, stem packing, threads, vacuum breaker, or supply connection. Outdoor faucet leaks matter because uncontrolled water can damage exterior walls, framing, and indoor finishes, and persistent moisture can support mold growth.
Outdoor faucets operate as small shutoff valves mounted through an exterior wall, so a leak can show up at multiple points: the spout, the handle/stem, the hose connection, or inside the wall cavity. A leak also changes winter risk. Water left in a short exterior valve body can freeze, expand, and crack brass or split copper, and freeze damage often reveals itself only after thawing.
Common outdoor faucet types homeowners encounter
- Standard hose bibb (short body): Shutoff point sits close to the exterior wall, which increases freeze risk in cold weather.
- Frost-free sillcock (long stem): Shutoff point sits deeper inside the home, which reduces freeze risk when installed correctly and when hoses are removed before freezing weather.
- Anti-siphon hose bibb (with vacuum breaker): Backflow prevention device helps reduce contamination risk when hoses connect to sprayers or chemical attachments.
Symptoms of a leaking outdoor faucet and what each symptom usually indicates
Outdoor faucet repairs start with matching a symptom to a likely failure point, because a drip at the spout suggests a different fix than water at the handle or moisture inside a wall. Outdoor faucet symptoms often point to a specific part such as a seat washer, packing washer, O-ring, vacuum breaker, or supply connection.
Most frequent symptoms (with likely causes)
- Dripping from the spout after shutoff: Worn seat washer, damaged valve seat, or debris preventing full closure.
- Water leaking around the handle/stem when running: Loose packing nut, worn packing washer, or worn stem O-ring (design varies by model).
- Spray or seepage at the hose connection: Missing or flattened hose washer, cross-threaded hose coupling, or failing vacuum breaker.
- Damp siding, wet brick, or stains below the faucet: Persistent seepage at the wall penetration, failed caulk, or leak at the mounting flange.
- Moisture inside the wall or interior staining near the faucet line: Split pipe, cracked fitting, or freeze damage behind the wall.
Red-flag observations that change the repair plan
- Green/white mineral buildup on brass or copper: Corrosion often indicates long-term seepage and can weaken threads.
- Rust streaks at fasteners or escutcheon: Water intrusion may be traveling behind the faucet flange.
- Loose or wobbly faucet body: Broken mounting screws or deteriorated sheathing can allow movement that stresses piping.
Immediate water-damage control for outdoor faucet leaks
Outdoor faucet repairs become more expensive when water migrates into wall cavities, so the first goal involves stopping flow and drying the area. Water-damage control for a leaking outdoor faucet includes shutting off the correct valve, confirming flow has stopped, and checking both exterior and interior surfaces for moisture.
Damage-control timeline (practical and safe)
- First 10 minutes: Shut off the interior shutoff valve feeding the outdoor faucet if the valve exists, or shut off the main water valve if a dedicated valve does not exist. Place a bucket under the spout and dry visible water to prevent slip hazards.
- 10–30 minutes: Inspect the wall area outside and the nearest interior wall surface for damp drywall, swelling trim, or staining. Photograph visible moisture for records and for a future repair scope.
- First hour: Confirm water remains off at the faucet by opening the outdoor handle and checking flow reduction to a stop. Call a licensed plumber if moisture continues, because ongoing moisture can indicate a behind-the-wall leak.
Simple checks that prevent repeat damage
- Hose removal check: Hose removal prevents trapped water from keeping a frost-free sillcock from draining.
- Vacuum breaker check: Vacuum breaker caps and screws can loosen, and a failed vacuum breaker can leak under pressure.
- Slope and drainage check: Soil grading that slopes toward the foundation can worsen damage when a leak saturates the area.
DIY-friendly outdoor faucet repairs: what homeowners can safely try
Outdoor faucet repairs for minor drips often involve replacing a washer, tightening a packing nut, or replacing a vacuum breaker, and many homeowners can perform those tasks with basic tools. DIY outdoor faucet repair becomes unsafe when the repair requires opening a wall, cutting pipe, soldering copper, or correcting freeze-damaged piping.
Tools and parts commonly used for basic repairs
- Adjustable wrench or correctly sized open-end wrench
- Flathead screwdriver and Phillips screwdriver
- Replacement washers and O-rings matched to the faucet model
- PTFE tape (thread seal tape) for threaded joints where appropriate
- Plumber’s grease (silicone-based) for O-rings on compatible designs
- Bucket, towel, and flashlight
Shut off the correct water supply
Shut off the interior shutoff valve feeding the outdoor faucet when the valve exists. Open the outdoor faucet handle to relieve pressure and drain remaining water.
Confirm faucet type and stem style
Confirm the faucet style as a standard hose bibb or a frost-free sillcock, because frost-free stems can be longer and can include additional seals. Identify the handle screw and packing nut location before disassembly.
Disassemble the stem assembly carefully
Remove the handle screw, remove the handle, and loosen the packing nut to pull the stem. Inspect the seat washer at the end of the stem for cracking, flattening, or missing material.
Replace worn sealing parts and inspect the valve seat
Replace the washer with the correct size and material match. Inspect the valve seat inside the faucet body with a flashlight, because pitting or grooves can prevent sealing even with a new washer.
Reassemble, restore water, and test under flow
Reinstall the stem, snug the packing nut, and restore water. Run water for several minutes and check leakage at the spout, handle, and wall penetration.
Tighten the packing nut in small increments
Turn the packing nut clockwise in 1/8-turn increments while the faucet runs, because over-tightening can make the handle difficult to turn and can damage packing.
Replace packing material if tightening fails
Remove the stem and replace the packing washer or O-ring when tightening does not stop seepage. Apply a small amount of silicone-based plumber’s grease on compatible O-rings to reduce wear.
Replace the hose washer first
Replace the rubber washer inside the female end of the garden hose, because a flattened washer can leak even when the faucet threads look intact.
Inspect threads and vacuum breaker components
Inspect faucet threads for cross-threading or deformation. Replace a worn vacuum breaker cap or internal parts when the anti-siphon assembly leaks during use.
Outdoor faucet replacement: when replacement beats repeated repairs
Outdoor faucet replacement becomes the best option when corrosion, freeze cracks, stripped threads, or a damaged valve seat prevents a reliable seal. Outdoor faucet replacement also makes sense when a faucet design lacks backflow protection and an upgrade to an anti-siphon or vacuum-breaker style improves safety.
Clear signs replacement makes sense
- Extensive corrosion: Flaking metal, heavy mineral deposits, or crumbling threads indicate weakened material.
- Cracked housing or stem: Freeze damage commonly splits the faucet body or fractures the stem.
- Persistent leaks after new washers: A pitted valve seat or stripped internal threads can defeat repeated seal replacements.
- Water leaking inside the wall: Behind-the-wall leaks require pipe inspection and repair, not only faucet parts.
- Outdated design without backflow prevention: Anti-siphon protection reduces contamination risk when hoses connect to sprayers or chemical attachments.
Repair vs. replace: quick comparison table
| Situation | Outdoor faucet repair usually fits | Outdoor faucet replacement usually fits |
|---|---|---|
| Drip at spout after shutoff | Worn washer or minor debris at seat | Pitted seat or internal damage after repeated attempts |
| Leak at handle while running | Packing nut adjustment or packing washer replacement | Corroded stem, damaged body, or recurring stem leakage |
| Spray at hose connection | New hose washer or vacuum breaker service | Stripped threads or cracked outlet |
| Moisture inside wall | Limited to exterior penetration sealing | Split pipe, cracked fitting, or freeze damage behind wall |
| Visible corrosion | Light surface buildup | Structural metal loss, crumbling threads, or seized components |
Choosing a new outdoor faucet (features that matter)
- Frost-free sillcock length: Frost-free models use a longer stem to move the shutoff point deeper inside the wall.
- Integrated vacuum breaker: Anti-siphon protection helps reduce backflow risk.
- Corrosion-resistant materials: Brass bodies and quality internal components resist outdoor exposure better than low-grade alloys.
- Correct connection type: Outdoor faucets can connect by threaded, soldered (sweat), PEX, or push-fit styles depending on the home’s plumbing.
Installation often requires pipe work inside the wall cavity. A licensed plumber can confirm compatibility with existing copper or PEX and can verify leak-free operation under full pressure.
Why outdoor faucet repairs vary in complexity (and what influences project scope)
Outdoor faucet repairs vary because access, pipe material, corrosion level, and freeze damage determine how much disassembly and pipe work is required. Outdoor faucet replacement projects can range from a straightforward swap at an accessible threaded connection to a more involved repair requiring interior pipe modifications.
Factors that commonly change repair scope
- Access to the connection: Exterior-only access limits options when a fitting sits inside a finished wall.
- Pipe material: Copper often requires soldering for certain connection styles, while PEX uses crimp, clamp, or expansion fittings depending on the system.
- Age and corrosion: Seized fasteners and stuck threads increase breakage risk during removal.
- Wall type: Brick veneer, stone, and stucco can complicate removal and re-sealing at the wall penetration.
- Presence of an interior shutoff valve: A dedicated shutoff simplifies future service and winterization.
- Evidence of freeze damage: Freeze splits can extend beyond the faucet into the supply line.
Cost drivers (without numbers)
Outdoor faucet repair pricing varies by project scope, access, materials, and the extent of pipe damage. Outdoor faucet replacement pricing varies by the chosen faucet type, wall material, and the amount of interior plumbing work required.
Process timeframes: what “how long does it take” means for outdoor faucet repairs
Outdoor faucet repairs often involve short hands-on work for simple seal replacements, while outdoor faucet replacement can require additional time for safe disassembly, pipe connection work, and leak testing. Project duration also depends on drying time when water damage mitigation becomes necessary.
Typical work stages by time horizon
- Immediate (minutes to hours): Water shutoff, initial diagnosis, and stopping active leakage.
- Same day (hours): Basic washer, packing, or vacuum breaker repairs when parts match the faucet model and access remains clear.
- Multi-day (days): Replacement involving wall access, behind-the-wall pipe repair, or careful corrosion removal can extend the project timeline.
- Follow-up (days to weeks): Wall materials and framing may require drying and repair when leaks soaked insulation or drywall.
A licensed plumber can also pressure-test and visually verify joints after reassembly, because slow leaks often appear only after sustained flow and repeated on/off cycles.
Common mistakes that turn small outdoor faucet leaks into bigger plumbing repairs
Outdoor faucet repairs fail most often because the wrong leak source gets treated, or because excessive force damages hidden piping. Homeowner mistakes commonly include overtightening fittings, using the wrong sealant, or ignoring moisture that indicates a behind-the-wall leak.
Mistakes licensed plumbers see frequently
- Sealant applied to the wrong location: Pipe thread sealant on exterior hose threads rarely stops a leak caused by a missing hose washer.
- Corroded fitting forced loose: Excess torque can snap copper or strip threads inside the wall.
- Incorrect washer size installed: Slight size mismatches can prevent full sealing and can accelerate wear.
- PTFE tape misapplied: PTFE tape belongs on tapered pipe threads when appropriate, not on hose threads designed to seal with a rubber washer.
- Hose left attached in freezing weather: A connected hose can trap water inside a frost-free sillcock and can cause freeze cracking.
Pro tips from licensed plumbers for longer-lasting outdoor faucet repairs
Outdoor faucet repairs last longer when the repair includes correct part matching, careful seat inspection, and proper winterization habits. Licensed plumbing best practices also include leak testing under sustained flow and verifying no moisture appears at the wall penetration.
- PTFE tape or quality pipe joint compound helps seal certain threaded pipe connections when the connection type requires thread sealing.
- Valve seat inspection with a flashlight can reveal pitting, and pitting often indicates outdoor faucet replacement will be more reliable than repeated washer swaps.
- Frost-free sillcock performance depends on hose removal before freezing weather, because drainage requires an open outlet.
- Leak testing should include a multi-minute run, a shutoff test, and a visual check inside and outside near the wall penetration.
- Part matching works best when a homeowner brings the old washer, stem, or vacuum breaker to the store, because outdoor faucet designs vary by manufacturer and era.
- Penetrating oil and patience reduce breakage risk on corroded fittings, and a licensed plumber can use specialized tools when fittings remain seized.
Homeowners dealing with broader leak concerns can also benefit from related guidance such as Pipe Repair: A Homeowner’s Guide to Leaks, Burst Pipes, and Smart Fix Options and water-damage-focused troubleshooting in Shower Pan Leak Water Damage: Causes, Early Signs, and Professional Fixes.
When a licensed plumber becomes the safest choice
Outdoor faucet repairs require a licensed plumber when leaks involve behind-the-wall piping, freeze damage, soldered connections, or repeated failures after correct basic part replacement. A licensed plumber also becomes the best option when water damage signs appear indoors or when a code-compliant backflow prevention upgrade is needed.
Call a professional when any of these conditions apply
- Water appears inside a wall, on interior drywall, or at baseboards near the outdoor faucet line.
- Outdoor faucet replacement requires cutting pipe, soldering copper, or modifying PEX connections inside a wall cavity.
- Outdoor faucet leaks persist after washer and packing replacements, which often indicates seat damage or body failure.
- Outdoor faucet components show cracking, heavy corrosion, or stripped threads that prevent secure hose attachment.
- Outdoor faucet plumbing lacks a functional shutoff valve, and a shutoff upgrade would improve maintenance and winterization.
Specialty Plumbing provides outdoor faucet repair and replacement help from licensed Prosper TX plumbing professionals. Specialty Plumbing also supports homeowners across Prosper, Celina, Frisco, McKinney, Allen, Plano, Aubrey, Oak Point, and Gunter with full-service plumbing diagnostics, and homeowners can explore related maintenance content such as Outdoor Faucet Repair: Essential Tips, Steps, and When to Call a Plumber and drainage basics in Sink Drain Unclog: Practical Tips, Safe DIY Steps, and When to Call a Plumber.
Common questions about outdoor faucet repairs
Why does my outdoor faucet keep leaking after changing the washer?
A leaking outdoor faucet can continue dripping after a washer change when the valve seat inside the faucet body is pitted or grooved. A damaged valve seat prevents a new washer from sealing fully. Outdoor faucet replacement often becomes the most reliable fix when seat damage appears alongside corrosion.
Can a homeowner replace an outdoor faucet without a plumber?
Outdoor faucet replacement can be a DIY project when the connection is accessible and the connection method uses straightforward threaded fittings. Outdoor faucet replacement becomes riskier when the faucet is soldered to copper, connected inside a finished wall, or seized by corrosion. A licensed plumber can prevent pipe breakage and confirm a leak-free, code-aligned installation.
What causes water to leak from the outdoor faucet handle area?
Outdoor faucet handle leaks usually come from a loose packing nut or worn packing washer that no longer seals around the stem. A small packing nut adjustment can sometimes stop the leak. Packing replacement becomes necessary when tightening fails to stop seepage.
How can a homeowner prevent an outdoor faucet from freezing and cracking?
Outdoor faucet freeze prevention starts with removing hoses before freezing temperatures, because trapped water can crack even frost-free sillcocks. An interior shutoff valve and seasonal draining also reduce freeze risk. Pipe insulation can help protect exposed piping near exterior walls.
What does water inside the wall near an outdoor faucet indicate?
Water inside the wall near an outdoor faucet often indicates a split pipe, cracked fitting, or freeze damage behind the wall. A behind-the-wall leak can continue even when the outdoor faucet handle stays off. A licensed plumber can locate the failure point and prevent hidden water damage from spreading.