Quick Summary (Garbage Disposal Installation TL;DR)
Garbage disposal installation is a kitchen plumbing and electrical task that requires correct unit sizing, compatible mounting hardware, watertight seals, and safe power connections. Garbage disposal installation problems in Prosper, TX commonly come from mismatched mounts, skipped dishwasher plug removal, loose slip-joint connections, and unsafe wiring under the sink. A reliable installation starts with verifying sink flange condition, checking the P-trap and drain alignment, confirming a grounded power source, and dry-fitting parts before sealing. A typical replacement can be straightforward when the new disposal matches the old mounting system and discharge height, but the job becomes more complex when cabinets are tight, drain lines are misaligned, or electrical connections require code-compliant updates. Pricing varies by project scope, existing conditions, and any related repairs. Specialty Plumbing, a locally owned, full-service provider with licensed Prosper, TX plumbing professionals, helps homeowners in Prosper and Celina, TX troubleshoot leaks, correct improper installs, and complete safe, code-aligned installations.
Garbage disposal installation: what the job actually includes (and why DIY installs fail)
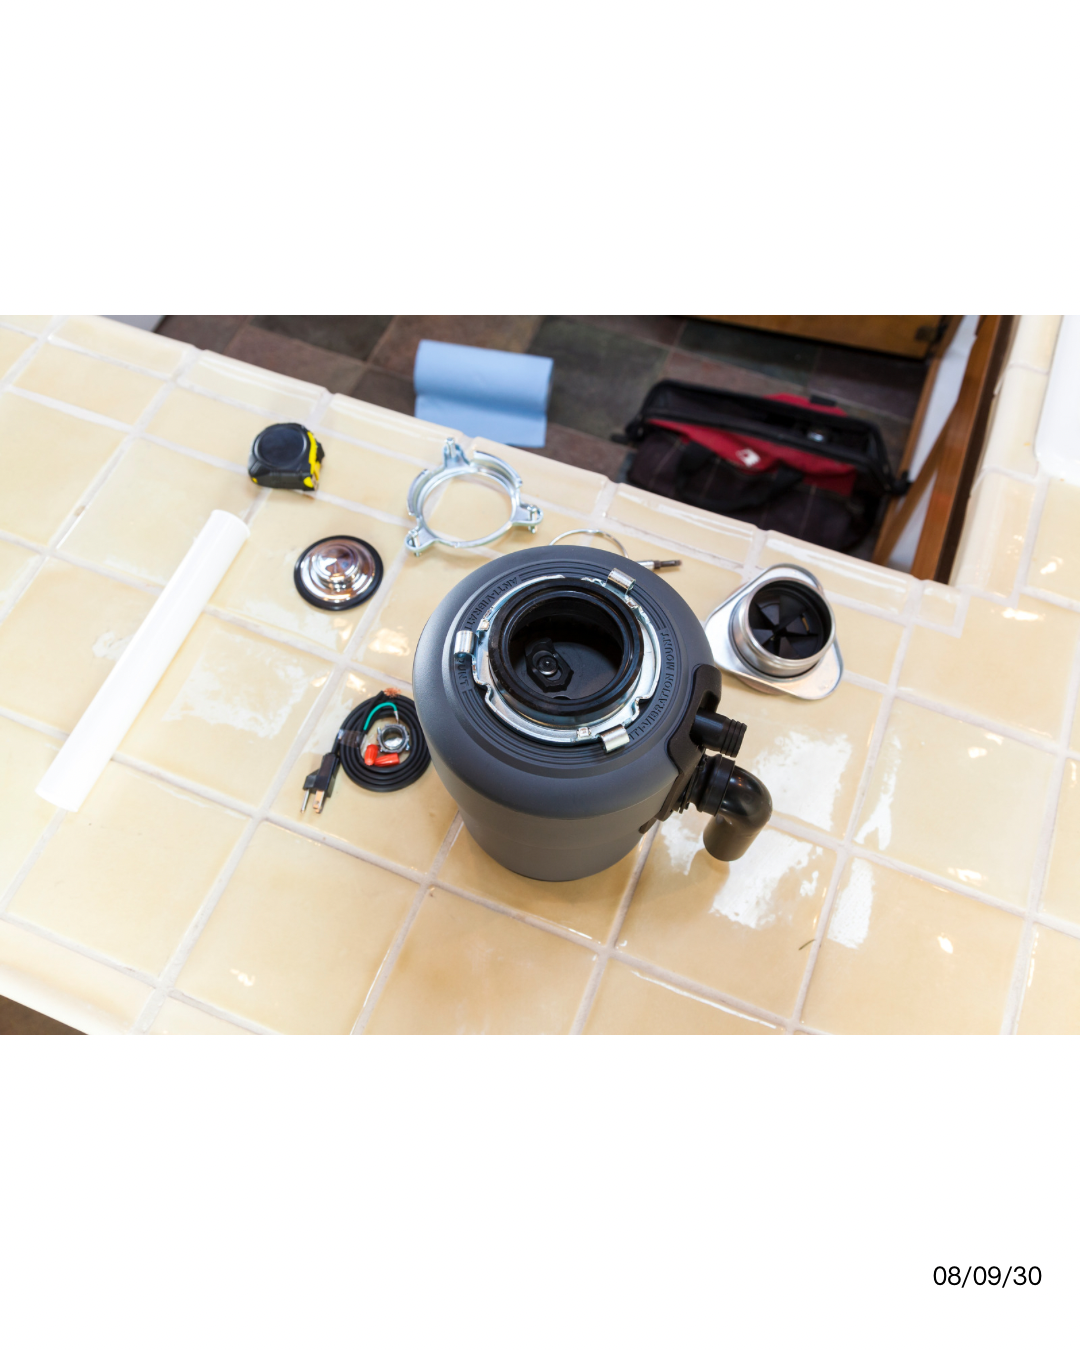
Garbage disposal installation is the process of mounting a disposal to a sink flange, connecting the discharge tube to the drain system, integrating an optional dishwasher drain line, and supplying safe electrical power. Garbage disposal installation fails most often when compatibility checks get skipped, seals get misapplied, or wiring gets handled without proper testing. A correct installation protects cabinets from water damage, prevents drain odors, and reduces vibration-related loosening over time.
Garbage disposal installation includes four systems that must work together: the sink flange and mounting ring, the disposal body and discharge outlet, the drain trap assembly (often a P-trap with slip-joint nuts), and an electrical connection (cord-and-plug or hardwired, depending on the existing setup). Manufacturer instructions matter because mounting styles differ across brands and model lines, including common “3-bolt” style mounts and “EZ-mount” style assemblies. Local plumbing best practices also matter because under-sink layouts in newer Prosper homes can be tight, leaving little room for misalignment.
What “good” looks like after installation
A good garbage disposal installation produces a stable, level disposal body with no movement at the mounting ring, no drips at the sink flange, and no seepage at slip-joint connections. A good garbage disposal installation also produces smooth drainage through the P-trap and a dishwasher line that drains without backing up. A safe garbage disposal installation includes a verified de-energized work area during wiring and a verified grounded connection after reassembly.
What Prosper homeowners get wrong about choosing a disposal (unit sizing and compatibility)
Garbage disposal selection requires matching horsepower class, physical dimensions, discharge height, and mounting compatibility to the existing sink and drain layout. Garbage disposal sizing mistakes cause frequent clogs, motor strain, and cabinet fit problems, especially when a larger body conflicts with drain lines or the dishwasher hose routing. A compatibility-first selection prevents “surprise” replumbing on installation day.
Homeowners often focus on horsepower and ignore mounting style and under-sink geometry. A busy household can overwhelm a small disposal, while a high-horsepower unit can be physically heavier and larger, requiring more clearance below the sink bowl. A disposal also must align with the existing drain inlet height, because a discharge outlet that sits too low can force a trap reconfiguration.
Compatibility checks to perform before buying
- Sink mount type check: a sink may use a standard 3-bolt mounting ring, an EZ-mount style system, or a brand-specific adapter.
- Cabinet clearance check: a disposal body needs space below the sink bowl and clearance from the cabinet back and side walls.
- Discharge height check: the discharge outlet must line up with the trap arm without forcing sharp angles.
- Dishwasher connection check: a dishwasher drain hose requires a disposal inlet port and a removed knockout plug.
Quick comparison: common disposal differences that affect installation
| Feature | What changes during installation | Why homeowners get stuck |
|---|---|---|
| Horsepower class | Larger motors often mean larger bodies and more weight | Tight cabinets make alignment and mounting harder |
| Mounting system | Ring style and bolt pattern must match the sink flange assembly | Incompatible mounts require adapters or flange replacement |
| Dishwasher inlet port | Knockout plug must be removed before dishwasher use | A missed knockout plug can cause a dishwasher backup or leak |
| Discharge tube geometry | Outlet angle and height affect trap alignment | Misalignment creates stress on slip joints and slow leaks |
Pre-installation checks: plumbing and electrical surprises to catch early
Garbage disposal installation prep requires inspection of drain pipes, sink flange condition, dishwasher drain routing, and electrical safety under the sink. Garbage disposal installation delays often come from corroded fasteners, misaligned trap arms, missing shutoff valves, or absent grounded power sources. A systematic pre-check prevents mid-job flooding and unsafe wiring decisions.
A homeowner should inspect the sink flange for corrosion, pitting, or old putty buildup that prevents a flat seal. A homeowner should inspect the P-trap and trap arm for cracks, cross-threaded slip nuts, or signs of prior overtightening. A homeowner should confirm a dishwasher hose route that avoids kinks and includes a high loop under the countertop when recommended by the dishwasher manufacturer.
Electrical prep matters because water and electricity share the same cabinet. A homeowner should verify an under-sink receptacle or a safe hardwired connection method consistent with local code requirements. A homeowner should use a non-contact voltage tester to confirm de-energized wiring before touching any conductors.
Tools and materials that reduce leak risk
- Basin wrench for tight faucet and flange access
- Plumber’s putty for sink flange sealing when manufacturer guidance allows putty
- PTFE thread sealant tape for threaded connections where appropriate
- Flashlight and inspection mirror for checking the back side of joints
- Paper towels for pinpointing slow seepage during testing
- Non-contact voltage tester for electrical safety verification
Garbage disposal installation steps (safe, code-conscious, and leak-focused)
Garbage disposal installation works best as a step-by-step process that separates power safety, mechanical mounting, drain alignment, and leak testing. Garbage disposal installation steps reduce mistakes when each connection gets dry-fit first and sealed only after alignment checks. A careful process also prevents cracked flanges, warped seals, and vibration-caused loosening.
De-energize and confirm a safe work area
Garbage disposal installation begins with switching off the correct circuit at the breaker and verifying power status with a non-contact voltage tester. A safe work area also includes clearing the cabinet base and placing a shallow pan or towel under the trap to catch residual water.
Remove the old disposal and inspect the sink flange
Garbage disposal replacement requires disconnecting the discharge tube, loosening the mounting ring, and lowering the old unit with controlled support. A sink flange inspection should check for corrosion, uneven surfaces, and old putty that prevents a flat seal.
Verify mount compatibility and dry-fit the new unit
Garbage disposal installation should confirm a compatible mounting assembly before any sealing. A dry-fit should confirm cabinet clearance, confirm the discharge outlet aligns with the trap arm, and confirm the dishwasher inlet port location works with the existing hose route.
Seal and seat the sink flange correctly
Garbage disposal installation sealing typically uses plumber’s putty under the flange when manufacturer instructions allow putty for the sink material. A uniform bead and even seating prevents slow leaks that show up days later as cabinet swelling or damp odors.
Connect the dishwasher drain correctly (when applicable)
Garbage disposal installation with a dishwasher requires removing the dishwasher inlet knockout plug inside the disposal inlet port before connecting the hose. A hose clamp should secure the dishwasher hose to the inlet nipple, and a test cycle should confirm drainage without backing up.
Connect the discharge tube and align the P-trap without strain
Garbage disposal installation plumbing should align the discharge tube to the trap arm with minimal force. A strain-free alignment prevents slip-joint nuts from loosening and reduces the chance of hairline leaks that leave water marks on the cabinet floor.
Complete electrical connection safely and restore power
Garbage disposal installation wiring must match the existing configuration, including cord-and-plug setups and hardwired setups. A safe electrical connection includes proper grounding and a secured junction cover, followed by restoring power at the breaker only after the cabinet area is dry.
Test for leaks and vibration under real use
Garbage disposal installation testing should include running cold water for several minutes while checking every joint with a flashlight and paper towel. A vibration check should confirm the disposal sits level and runs without rattling, because vibration can loosen connections over weeks of use.
Common installation mistakes that cause leaks, odors, and electrical hazards
Garbage disposal installation mistakes usually come from overtightening, incorrect sealant use, misaligned traps, and missed dishwasher plug removal. Garbage disposal installation leaks often begin as slow drips at the sink flange or slip joints and later become cabinet damage or mold-friendly dampness. Garbage disposal installation electrical hazards often come from untested circuits, improper grounding, or unsecured wiring compartments.
Mistakes Specialty Plumbing commonly sees in Prosper kitchens
- Mounting ring overtightening that warps a flange seal or stresses a sink basin
- Slip-joint misalignment that forces the P-trap to sit under tension
- Incorrect sealant choice, including silicone used where plumber’s putty or a gasketed seal is specified
- Disposal body misleveling that increases vibration and loosens fasteners over time
- Dishwasher inlet knockout plug left in place, causing dishwasher drain backup
- Leak testing skipped, allowing slow seepage to go unnoticed until cabinet materials swell
Fast leak-spotting method that works for slow drips
A paper towel wipe test identifies slow leaks by leaving visible wet tracks at the exact joint location. A flashlight beam aimed across the joint surface highlights beads of water that a direct overhead light can miss. A 5-minute recheck after the first run catches seepage that appears only after vibration begins.
What drives garbage disposal installation complexity and pricing
Garbage disposal installation pricing varies by project scope, existing plumbing condition, electrical setup, and any required corrections under the sink. Garbage disposal installation complexity increases when corrosion, tight cabinetry, misaligned drains, or prior DIY modifications require additional repair steps. A detailed inspection produces the most accurate plan because under-sink conditions vary widely across homes.
The biggest variables that change the job
- Existing plumbing condition: corrosion, rust, and brittle plastic fittings raise risk during disassembly
- Under-sink access: deep sink bowls and tight cabinets reduce tool clearance
- Disposal type and weight: heavier units can require more careful mounting and alignment
- Electrical configuration: missing grounded power sources or unsafe wiring requires correction before operation
- Stuck components: seized fasteners and hardened putty increase removal time and damage risk
- Hidden leaks: a corroded flange or cracked trap can require repair before installation can be considered safe
Homeowners in Prosper and Celina, TX often discover that a “simple swap” becomes a larger under-sink tune-up after removal reveals worn slip-joint washers, a cracked trap arm, or a flange surface that no longer seals reliably.
How long garbage disposal installation takes (realistic timeframes by scenario)
Garbage disposal installation time depends on whether the job is a like-for-like replacement, a first-time install, or a replacement that requires plumbing or electrical corrections. Garbage disposal installation work often fits into a single work session for straightforward swaps, while more involved corrections can extend the project into additional planning, parts sourcing, and re-testing. A realistic timeline prevents rushed sealing and rushed wiring decisions.
Typical timeline perspectives (not service promises)
- Immediate (first hour): removal, flange inspection, dry-fitting, and initial mounting steps often happen early because access is best before hoses and wiring return to place.
- Same day workflow: leak testing, vibration checks, and dishwasher drain verification should happen after full reassembly, because real flow and vibration reveal weak joints.
- Next-day check: a cabinet floor recheck the next day can catch slow seepage that appears only after multiple use cycles.
- Weekly maintenance habit: a weekly visual scan for moisture, rust stains, or odor helps prevent long-term cabinet damage.
- Monthly performance check: a monthly check for unusual vibration or slow draining helps identify trap alignment issues before a slip joint loosens.
A homeowner should follow manufacturer guidance for reset procedures and jam-clearing tools, because different models use different reset button placements and wrench interfaces.
Damage-control checklist: what to do when a leak appears after installation
Garbage disposal installation leak response requires immediate power safety, controlled water containment, and systematic joint inspection. Garbage disposal installation leak sources usually appear at the sink flange, dishwasher hose connection, discharge tube, or P-trap slip joints. A fast response reduces cabinet swelling, flooring damage, and odor development.
Shut off power and protect the cabinet base
Garbage disposal leak response begins with switching off the breaker and unplugging the unit if a plug connection exists. A towel barrier and a shallow pan under the trap reduce cabinet base saturation.
Identify the leak location with a dry wipe and flashlight
Garbage disposal leak diagnosis works best by drying every joint and then running cold water while watching for the first bead of water. A paper towel test isolates the exact joint faster than visual guessing.
Correct only the obvious, low-risk issues
Garbage disposal leak correction can include hand-tightening a slip nut, reseating a slip-joint washer, or tightening a hose clamp. Over-tightening creates new leaks by cracking plastic fittings or warping seals.
Stop and escalate when the leak source stays unclear
Garbage disposal installation should pause when water appears from behind the disposal body, from the flange area after resealing attempts, or from any electrical compartment area. A licensed plumber can confirm safe operation and prevent repeat leakage.
When garbage disposal installation should shift from DIY to a licensed professional
Garbage disposal installation should involve a licensed professional when electrical safety becomes uncertain, plumbing alignment requires reconfiguration, or leaks persist after correct resealing attempts. Garbage disposal installation by a licensed Prosper, TX plumbing professional reduces risk of cabinet damage, mold-friendly moisture, and code issues under the sink. A professional assessment also identifies hidden problems like corroded flanges and cracked drain fittings.
Clear decision criteria for calling a plumber
- Persistent leaks after correct reseating of washers and correct flange sealing
- Electrical symptoms such as sparking outlets, tripped breakers, or uncertain grounding
- Drainage that stays slow after clearing obvious blockage and confirming trap alignment
- Disposal vibration, rattling, or mounting movement after leveling and tightening per manufacturer guidance
- Dishwasher drainage problems after confirmed knockout plug removal and hose clamp tightening
- Evidence of water damage under the sink, including swollen cabinet base panels or recurring musty odors
Specialty Plumbing provides full-service plumbing support for Prosper and Celina, TX homeowners who want a safe installation, a corrected under-sink layout, or a second opinion on a DIY job that keeps leaking. Specialty Plumbing work reflects licensed Prosper, TX plumbing professionals and locally owned expertise focused on code-aligned, leak-resistant results.
For related homeowner guidance, Plumber Prosper TX: How to Diagnose Common Problems, Try Safe DIY Fixes, and Know When to Call a Licensed Pro provides decision rules that apply to under-sink plumbing. Drain performance concerns after an install often overlap with broader clog issues covered in Need a Drain Cleaning Service in Prosper TX? Warning Signs, What Pros Do, and How to Avoid Repeat Clogs.
Pro tips from licensed Prosper, TX plumbing professionals (practical, not theoretical)
Garbage disposal installation success depends on power safety, correct seal selection, and strain-free drain alignment. Garbage disposal installation quality improves when homeowners dry-fit first, avoid overtightening, and test under real water flow. A disciplined approach prevents the most common leaks and vibration issues.
- Power safety tip: breaker shutoff plus voltage testing reduces risk during wiring checks.
- Sealant selection tip: manufacturer guidance determines gasket use versus plumber’s putty use, especially on specialty sink materials.
- Alignment tip: a level disposal body reduces vibration and helps slip joints stay tight over months of use.
- Inspection tip: a mirror check behind the disposal body reveals drips that stay invisible from the cabinet front.
- Testing tip: cold water flow during grinding reduces grease accumulation and supports smoother discharge.
Homeowners who want a broader prevention plan for leaks and surprise repairs can cross-reference Plumbing Inspection in Prosper, TX: A Homeowner’s Guide to Preventing Leaks, Water Damage, and Surprise Repairs.
Common Questions About garbage disposal installation
Can a homeowner handle garbage disposal installation without a plumber?
Garbage disposal installation can be manageable when a like-for-like replacement matches the existing mount, drain height, and electrical setup. Garbage disposal installation should shift to a licensed plumber when wiring safety feels uncertain or leaks persist after careful resealing.
Why does a new disposal leak from under the sink after installation?
Garbage disposal installation leaks usually come from sink flange sealing problems, misaligned P-trap connections, or loose slip-joint nuts. Garbage disposal installation leak diagnosis should check the flange, discharge tube, dishwasher hose clamp, and every slip joint with a paper towel test.
What does a humming disposal mean after garbage disposal installation?
A humming disposal after garbage disposal installation usually indicates a powered motor with a jammed flywheel. Garbage disposal troubleshooting should start with breaker shutoff and manufacturer-approved jam-clearing steps, because forcing movement can damage internal components.
Does a dishwasher need a special step during garbage disposal installation?
Garbage disposal installation for a dishwasher connection requires removal of the dishwasher inlet knockout plug inside the disposal port. Garbage disposal installation should also secure the dishwasher hose with a clamp and verify drainage during a test run.
What factors change the complexity of garbage disposal replacement in Prosper, TX homes?
Garbage disposal replacement complexity often increases with corroded drain fittings, tight cabinet clearances, and misaligned trap arms. Garbage disposal installation complexity also increases when electrical connections require code-aligned grounding and safe enclosure practices.
Ready to stop leaks and get a stable, quiet disposal
Garbage disposal installation support from Specialty Plumbing helps Prosper and Celina, TX homeowners avoid under-sink leaks, vibration issues, and electrical uncertainty. Specialty Plumbing services reflect licensed Prosper, TX plumbing professionals and a locally owned, full-service approach focused on safe connections and thorough testing. Availability varies; contact Specialty Plumbing to confirm scheduling and project fit.